

Cherry Croissants from Brooks Hotel
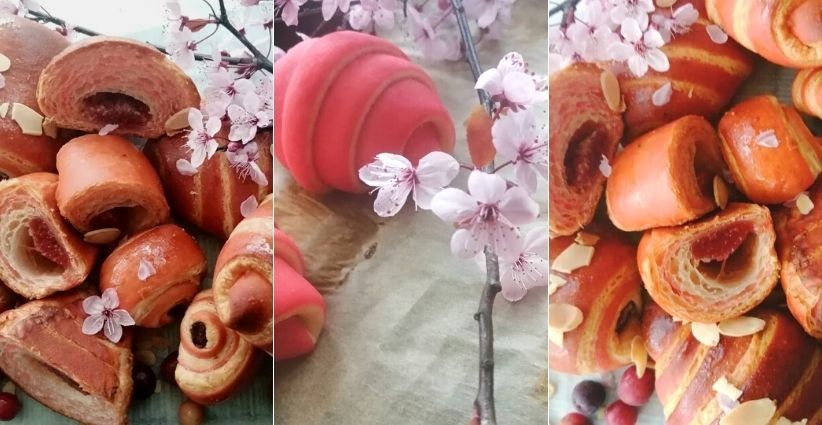
Inspired by Spring and the Cherry blossoms coming out to bloom across Dublin City, Brooks Chef has shared his recipe for delicious Cherry Croissants. Rich, buttery and utterly delicious they are worth the time and effort that is needed to create them.
These would sit perfectly on a tray delivered to a loved one for breakfast in bed but you will need to start preparing midweek if you want to have them for the weekend as this recipe requires 3 days to make.
Now that is what you call ‘Made with Love’
Ingredients
Croissant Dough
500 g French Type 55 flour or unbleached all-purpose flour / plain flour (extra for dusting)
140 g water
140 g whole milk (you can take it straight from the fridge)
55 g sugar
40 g soft unsalted butter
11 g instant yeast
12 g salt
Cherry Puree
200g cherry puree
20g cornflour
40g sugar
Laminating ingredients
280 g cold unsalted butter for laminating
1 egg + 1 tsp water for the egg wash
DAY 1
Making the croissant dough
- Combine the dough ingredients and knead for 2-3 minutes, at a low speed in an electric mixer until the dough comes together. Take care not to over knead at this stage.
- Take 20% of dough weight (approx. 125g) mix this in a separate bowl with 2-3g of red food colouring, 10g of butter, 10g of flour until dough is a pink colour. Roll out flat approx. 20cm x 20cm, clingfilm and place in fridge overnight.
- Shape the dough like a disc, cover with clingfilm and place in the fridge overnight.
Making the cherry puree
- Make the cherry puree by mixing all ingredients together, and bring it to the boil. Stir until the mix has become thick.
- Pour the puree into a container lined with clingfilm and leave to set in the fridge overnight.
DAY 2
Laminating the dough
- Cut the cold butter (directly from the fridge) lengthwise into 1,25 cm thick slabs.
- Arrange the pieces of butter on waxed paper to form a square of about 15 cm x 15 cm.
- Cover the butter with another layer of waxed paper and with a rolling pin pound butter until it’s about 15cm x 15cm.
- Trim / straighten the edges of the butter and put the trimmings on top of the square.
- Now pound lightly until you have a final square of 17 cm x 17 cm. Wrap in parchment paper and refrigerate the butter slab until it is needed.
- Take the dough out of the fridge. With a rolling pin roll out the dough disc into a 20 cm x 20 cm square.
- .Remove the slab of cold butter from the fridge. Place the dough square so one of the sides of the square is facing you and place the butter slab on it with a 45 degree angle to the dough so a point of the butter square is facing you.
- Fold a flap of dough over the butter, so the point of the dough reaches the center of the butter.
- Do the same with the three other flaps. The edges of the dough flaps should slightly overlap to fully enclose the butter.
- With the palm of your hand lightly press the edges to seal the seams.
- With a lightly floured rolling pin start rolling out, on a lightly flour dusted surface, the dough to a rectangle of 20 x 20 cm. this recipe. Aim at lengthening the dough instead of making it wider and try to keep all edges as straight as possible.
- Fold the dough letter style, cover with clingfilm and refrigerate for 30 minutes
- Repeat the rolling and folding two more times (ending up with 27 layers of butter in total), each time rolling until the dough is about 20 cm x 20 cm. After the dough should be turned 90 degrees before being folded again.
DAY THREE
- Place the red dough on work surface, give a light brush of water and place the other dough on top. Roll until it’s approx. 20cm x 20cm
- Take the dough from the fridge. Lightly flour your work surface.
- Gently roll the dough into of 20 cm x 20 cm
- When your dough has reached its intended shape, carefully lift it a few centimetres to allow it to naturally shrink back from both sides. This way it will not shrink when you cut it.
- For the next stage you will need a tape measure and a pizza wheel. Lay a tape measure along the top of the dough. With the wheel you mark the top of the dough at 9cm cm intervals along the length.
- Lay the tape measure along the bottom of the dough and make a mark at 4.5 cm. Then continue to make marks at 9cm cm intervals from this point.
- Make diagonal cuts starting from the top corner cutting down to the first bottom mark. Make diagonal cuts along the entire length of the dough. Then change the angle and make cuts from the other top corner to the bottom mark to create triangles. Again repeat this along the length of the dough. This way you will end up with 15 triangles and a few end pieces of dough.
- Using your pizza wheel, make 1.5 cm long notches in the centre of the short side of each dough triangle.
- Now very gently elongate each triangle to about 25 cm.
- Place 1 teaspoon of the cherry puree at the wide end of the triange, just below the notch.
- After you cut a notch in the middle of the short end of the triangle, try and roll the two wings by moving your hands outwards from the centre, creating the desired shape with a thinner, longer point.
- Place on a baking tray lined with parchment paper and ensure there is enough space between each croissant as they will expand in the oven.
- Mix the water and egg, and gently egg wash each croissant
- Place in a pre-heated oven at 160c for 20 minutes